Delcam Launches 64-Bit Inspection Software
CAD/CAM developer Delcam recently introduced the first version of its PowerINSPECT inspection software for use on 64-bit computers. Other enhancements in the 2011 R2 version include improved visualization of the results, easier creation of automated inspection routines, full integration of DRO (Digital Read-Out) functionality and support for the latest Renishaw probes.
PowerINSPECT is a “hardware-independent” inspection software that combines the ability to work with all types of inspection devices with a comprehensive range of inspection routines for making simple measurements: it’s used to inspect geometric features and to check complex surfaces, and it delivers detailed reports with easy-to-read formats that can be understood by engineers generally — “not just inspection specialists,” Delcam emphasized.
“The introduction of support for 64-bit computers will enable increased memory use on that hardware,” the developer stated. “This will be of benefit for more memory-intensive applications where larger CAD files need to be manipulated, especially for very complex parts and multi-component assemblies.”
It identified two developments that will make it easier to see results from PowerINSPECT. First, dimensions can be displayed on the CAD view to give clearer reporting for distances between features.
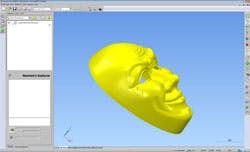
Second, point-cloud data can be shaded, which will give the user an immediate impression of the shape of the scan and allow him or her to see readily whether sufficient data has been collected. It will also make it easier to select key points or specific areas from within the cloud of data.
The initial 2011 release of PowerINSPECT added the ability to create automatically a grid of points for an inspection routine. The R2 version also allows automatic generation of probe paths from curves in CAD models. The spacing of the measurement points is set to match the control points on the curve.
The PowerINSPECT DRO (Digital Read-Out) lets users view the XYZ coordinates of the measuring device and is useful for ‘marking out’ or copying required coordinates onto a part. This is a common task with clay models and is usually achieved with a point probe or scriber on a layout machine. The DRO previously had to be installed alongside PowerINSPECT as a standalone program but the new release allows it to run inside PowerINSPECT. This makes the process more seamless and allows the user to take advantage of PowerINSPECT’s alignment functions.
PowerINSPECT can accept data collected with Renishaw’s new PH20 probe, too. This combination allows measurements to be made across all probe angles, Delcam explained, rather than simply the incremental angles offered previously. It also introduces the ability to make rapid ‘head touch’ moves, which use the rotary motion of the probe head to collect the points quickly and accurately, rather than moving the entire machine.
