Switching Software for Simplicity, Accuracy in Medical Parts Machining
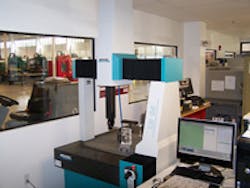
New Wenzel LH 6.7.5 CMM with scanning probe in CMM lab at Tomz Corp.
Tomz Corp. is a supplier of precision, CNC-machined medical components in titanium, cobalt, stainless steel, aluminum and plastic. Surgical instrumentation, medical tooling and implants make up the bulk of the products Tomz manufacturers to TS16949 standards. In-process inspection by coordinate measuring machinery (CMMs) is a necessary aspect of the manufacturing process, not only to ensure the resulting quality but also to guarantee a level of dimensional integrity that minimizes scrap — and the profitability of the contract.
Gary Labbe, president of the Tomz Corp. Plastics Division explains: “We have been using two CMMs for over 10 years to measure and report the quality on the series of acrylic plastic parts that we manufacture for a variety of blood analyzer and dialysis machines. In that time, we have attempted to advance and improve the operation of those machines by upgrading with new software. Our experience with that process has been mixed.
“One of our CMMs was updated with new DMIS software, but the software upgrade never materialized like we expected and it became a time-consuming and irritating issue because we were not able to convert our part programs to the new versions and our computers kept crashing. Ultimately we had to maintain three different versions on two different PCs, which just weren’t working,” Labbe reveals.
“We made the decision to take a new approach and purchase a new machine, with new software. After a thorough benchmarking search, we settled on a Wenzel LH 6.7.5 with a SP25 scanning head, OpenDMIS™ software, and a broad service package from Wenzel/Xspect Solutions Inc. We have been very pleased with the speed and scanning ability of the Wenzel machine.”
According to Labbe, what impressed Tomz was the package that Wenzel/Xspect Solutions offered. “They examined our current situation and focused on trying to utilize the best of what we had and combine it with the new Wenzel machine,” he recalls.
Acrylic plastic medical equipment component measured with Renishaw scanning probe on Wenzel LH 6.7.5 CMM.
For example, the dimensioning and tolerances of the part prints that the shop receives from customers were designed for use with an alternative dimensional measurement software program. That presented some issues with respect to inputting the true-position of form tolerances on some part programs.
In just a few days, Xspect Solutions built a software patch that could address those issues and make them fully operational with OpenDMIS. “This was necessary because our original DMIS software had a few commands interpreted differently to the current 5.0 standard,” Labbe explains. “Because our programs had been originally created in pure, native DMIS code, transition to a new CMM could have been very painful. However, what we discovered was that programming in the universal ISO Standard CMM language of DMIS is both technologically and vendor independent. The DMIS Standard work,” he emphasizes, “and, while many CMM purchase decisions are taken without any thought towards what will happen to the CMM in the future, DMIS offers the only long-term seamless and guaranteed migration path. At the end of the day, the CMM structure and the part programs will outlive the CMM software, so portability is critical over the long haul.”
The Wenzel LH 6.7.5 is a CNC bridge type CMM with a Renishaw scanning probe system. The machine has a measuring range of 650 x 750 x 500 mm. The machine features a Y-axis that is machined directly into the impala black granite base plate providing optimal long-term accuracy and stability. The X- and Y-axis guide-ways are bellows-protected against contamination. High-speed dynamic servo drives with position monitoring provide the axes movement. A compact HT 400 joystick teach-pendant control is provided for inputting mouse-like function. It also has context-sensitive function buttons with two-stage speed selection and variable speed adjustment in all operation modes, which results in sensitive movement via joystick or for CNC programming debugging.
