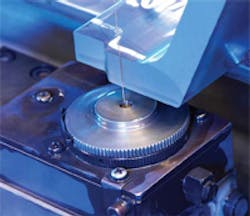
Here’s a simple way to check the mechanical accuracy of a wire EDM. For the Z axis, use a cylinder square, and at the very least a master precision square with a 0.0001-in. indicator for the X and Y axes. Of course, it goes without saying that the devices used in the measurement and the surfaces used to place them on need to be accurate to begin with. That’s about as simple as it gets if you have the equipment.
In addition, making a 2-in. square test cut in 2-in.-thick material and measuring the results is also an option. This procedure tests more than just the mechanical accuracy and requires checking the results with a height gage (properly set up) on a granite surface plate. If an outof- square condition arises in the Z-axis direction, it must be verified whether it’s squareness or taper. No matter what is being checked, make sure the gages/instruments being used are themselves accurate.
When doing the test-cut method, remember that the room, water and part temperature can affect the machine’s accuracy. Some machines will grow rapidly with a temperature change, but take a long time to re-stabilize. An unstable machine environment negatively affects machine accuracy.
One other thing to verify when machineaccuracy issues arise is if the machine is still level. It’s easy to check and can often be the cause of accuracy-related problems.
Online name
Hollistergc
Cincinnati, Ohio
