Laser Doppler focuses on machine-tool optimization
This Doppler isn't tracking a weather front, it's monitoring machine tool accuracy.
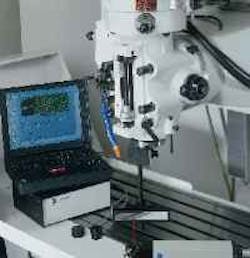
Laser beam reflects off a flat mirror mounted on machine spindle. The beam is detected and processed for displacement information, which is used to determine position accuracy of the CNC machine tool.
By pointing the laser beam in the X-axis direction and mounting a flat mirror target on the spindle, the X-axis coordinate of the spindle motion can be measured even with a large Y-axis direction movement.
In order to achieve true productivity improvements during the machining process, it is important to optimize and monitor machine tool performance. One method of accomplishing this is to check both static and dynamic position errors of the CNC machine and servo system. This check provides information on achieving and maintaining a given quality level, reducing scrap, and improving machine uptime.
A variety of tests verify the accuracy of machine tools and motion control systems. Today, one such method is using a laser interferometer to check positioning accuracy of a machine axis. But, because the laser interferometer cannot check the machine's actual tool-path or true dynamic conditions, it checks only the end-points. Therefore, for a true reading, one must also check each axis independent of the others.
Using a telescoping ballbar for dynamic testing shows how two axes work together to move a machine in a circular path. The machine traverses on multiple axes along a circular trajectory, with each axis going through sinusoidal acceleration, velocity, and position changes. Measured circular path data shows any deviation the machine makes from a perfect circle. The shapes are diagnosed and correlated to servo mismatch, backlash, reversal spikes, squareness error, cyclic error, stick slip, machine vibration, and more.
The ballbar consists of two steel balls supported by two three-point contact magnetic sockets, which are clamped to the spindle nose and on the table of the machine. The balls are connected by a telescoping bar, and movement is detected by a transducer similar to a linear variable differential transformer. The ball clamped on the table socket is the center of rotation, while the ball on the spindle socket performs circular motions.
The control system moves the spindle around a circle having the same radius as the ballbar's length. As the path deviates from a perfect circle, the change in distance between the two ends of the device is measured by the transducer. Hence, the deviations in circular interpolation or machine geometry are detected by the telescoping ballbar. The data collected is then plotted in a polar coordinate and compared with a perfect circle.
Telescoping ballbar systems normally work with radii of 50 to 600 mm. Circular tests with larger radii usually trace back to problems with the machine's geometry rather than the controller. Also, because of the larger radii, machine errors are larger than those produced by the control loops and consequently tend to be hidden.
In contrast to these methods, the laser/ballbar technique is based on a single-aperture laser doppler displacement meter (LDDM). System features include the following:
- Measurement is noncontact.
- Circular path radii can be varied continuously from 1 to 150 mm (or larger with optional mirrors).
- Linear accuracy is traceable to NIST.
- Feedrate is up to 4 m/sec.
- Data rate is up to 1,000 data points/sec with a file size up to 10,000 data points per run.
- Actual feedrate, velocity, and acceleration of the machine under test can be determined from or compared to the programmed feedrates.
How the laser/ballbar works
The LDDM uses the principle of Dopplermetry. When a stabilized laser beam reflects from a target, the Doppler frequency shift is proportional to the velocity. Since the frequency shift is the change of the phase and the velocity is the change of the position, the Doppler phase shift is proportional to the position. Once the phase is measured, the position can be determined.
Since the LDDM is both flexible and compact, it is possible to fit two interferometers in one head. Two apertures can also be reduced so that both the output and receiving laser beam share the same aperture. With this single-aperture optical arrangement, a flat mirror can be used as the target, making it possible to tolerate large lateral displacement.
Data collection and processing
Hardware required for the laser/ballbar includes a single aperture laser calibration system such as the MCV-500 from Optodyne Inc., Compton, Calif.; optical adapter; flat mirror target with a mount; PC interface card; notebook PC; and Windows software.
For a small radius or high feedrate circular test, high data rates are required. Using a PCMCIA interface card, data rates up to 1,000 data points/sec can be achieved. Since the software for the data collection and processing is Windows based, data can be collected automatically and processed to generate a polar plot of the circular path. An ASCII output data file can also be generated for external data processing or diagnostics.
Performance comparison
Since the laser/ballbar is a 2D measurement, both the X and Y coordinates are measured to generate the circular path.
On the other hand, only radius changes along the angular positions are measured when using the telescoping ballbar, making it a one-dimensional measurement. Furthermore, when using the telescoping ballbar, the angular positions are not measured, but calculated by assuming the machine feedrate is constant.
The telescoping ballbar also has a cable between the transducer (inside the telescoping bar) and the electronic processor. The cable makes it very difficult, if not impossible, to make a circular path with multiple revolutions. Also, because the length of the telescoping bar is fixed, the radius of the circular path is fixed. And, due to the size of the transducer, it is very difficult to do a circular path radius smaller than 50 mm.
