Recent developments in the science of spindle metrology have made spindle error analysis simpler and faster.
Spindle error motions are a primary source of quality degradation and product failures in machine tools, disk drive spindles, and any other processes requiring a precision rotating axis, so spindle performance is the key to manufactured part quality.
Measuring spindle error motions enables engineers and operators to determine the capabilities of the spindle before making parts or installing the spindle in a larger system.
When shops characterize and control their spindles, they can predict and control part quality. Feature location, roundness and surface finish are dependent on spindle performance.
However, spindles must be measured under actual operating conditions; only measurements of a rotating spindle are meaningful to part quality.
Here is one resource that shops can use to confirm that spindles are optimized for their production:
Data acquisition process speeds up spindle error analysis
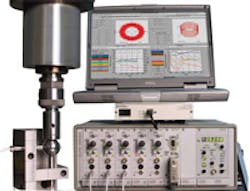
Lion Precision (www.lionprecision) has adapted a data acquisition tool made by National Instrument to simplify the use of its spindle error analyzer system. Lion Precision said the USB-6251 Multifunction DAQ from National Instrument eliminates nearly 30 percent of the support time required for analyzing spindle errors.
Lion Precision said its sensor systems include a high-density connector configured for National Instruments hardware that allows the data acquisition tool to connect to spindle sensor systems and to any USB port available on a computer.
Drivers are installed automatically during the installation of the Spindle Error Analyzer to capture sensor data that is used with the analyzer’s software. The company said the installation and initialization of the data acquisition tool now is transparent to the user, who now only has to install the Spindle Error Analyzer software and connect the hardware to be ready to collect data.
“This is a major step forward in simplifying a complicated process for our customers,” Don Martin, director of development for Lion Precision, said.
Lion Precision’s Spindle Error Analyzer uses high-resolution capacitive sensors and proprietary software to measure and analyze the error motions of precision spindles that are used in machine tools and disk drives.
The analyzer presents measurement results and analyses as discreet values and as two- and three-dimensional charts.
The company said users report saving millions of dollars by pretesting machine tools before acceptance.
Lion Precision sensor systems feature connectors that are compliant with National Instrument devices, and the company provides virtual instrument drivers to make their sensing systems available to be used with LabView.
Lion Precision equipment also fully embraces the TEDS (Transducer Electronic Data Sheet) standard.
Lion Precision said its highprecision, noncontact displacement sensors, use capacitive and eddy-current technologies, and are capable of resolutions to subnanometer degrees.
