Phantom laser scanning
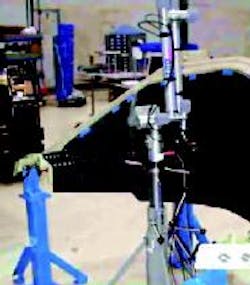
Boeing s Phantom Works facility reduces reverse-engineering time for parts such as this Joint Strike Fighter inlet with a ModelMaker laser-scanning system.
Using special surfacing software and scanned data from its ModelMaker, Boeing s Phantom Works creates highly accuate CAD part-surface models.
Implementing laser scanning substantially reduces reverse-engineering time while improving lean manufacturing at Boeing's Phantom Works facility in St. Louis. Producing a CAD model from a physical product is important where the company makes modifications to old aircraft as well as other situations. Laser scanning quickly measures large parts, generating lots of data points. Using special surfacing software and scanned data, the shop creates CAD part-surface models accurate to ±0.012 in. to sheetmetal surfaces and ±0.003 in. for hole positions.
Previously, Phantom Works technicians used height gages and other manual-measuring instruments to measure discrete points on the aircraft surface. But this approach provided just critical dimensions. It was also time consuming and only as accurate as the person taking the measurements. While a CMM captured thousands of data points over several days, it couldn't completely define curved surfaces.
Phantom Works chose the ModelMaker laser scanner because it captures shape information quickly and accurately without touching the model. The system includes a 3D-laser sensor, mechanical digitizer on which the sensor attaches, PC, and software that extracts, displays, and translates data. Its sensor is a single-viewpoint laser stripe that incorporates the illumination and sensing means for capturing 3D data. Several commercially available position-sensing mechanisms are configurable to ModelMaker. Phantom Works went with the FaroArm from Faro Technologies Inc. in Lake Mary, Fla.
Phantom Works brings ModelMaker into the hanger where aircraft is located. To capture a part shape, technicians hold the laser sensor so that a line of laser light appears on it while a small CCD camera views the line as it appears on the surface. The mechanical digitizer moves freely about the body for easy sensor positioning.
As the technician moves the sensor over the surface, a dedicated interface card translates the video image of the line into 3D coordinates. This data combines with the Cartesian and angular coordinates generated at each mechanicalarm position, resulting in a dense 3D data-point cloud.
When aircraft CAD models don't exist, Phantom Works exports data from the PC running ModelMaker in ASCII format and imports it into a 3D CAD system to create a CAD model from coordinate data. Often, the shop then transfers this model to a CAM program for creating toolpaths to produce parts.
If a CAD model exists, the data exports from the PC into a program called Surfacer that compares the point cloud to the existing CAD model. This registration process superimposes the point cloud from the scanned data onto the CAD surface model. A resulting colorcoded plot indicates exactly how much the collected data points deviate from the CAD model.
Nvision Inc.
Southlake, Tex.
nvision3d.com
