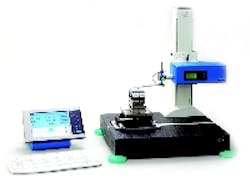
New Modular Roughness Measuring System
The W55 can store up to 30 different workpiece programs for different part numbers or different features on the same part. Each workpiece program can be identified by text or digital photo on the 10 in. display. Within each workpiece program data can be tagged to identify operation number, machine number, operator and more.
Using a LAN interface, the W55 can acquire and save measured roughness data centrally and transfer them to a statistics server. The LAN interface also allows the use of central printers. Standard printers, USB memory sticks and other standard peripheral devices can be used via the built-in USB interfaces.
The W55's software permits calculations of all common roughness, core roughness, profile and waviness parameters and tolerance monitoring, management of up to 30 different measuring programs as well as practice-oriented operation with function keys. The ability to measure dominant waviness of sealing surfaces, for example, is new to this instrument class according to the company.
W55 includes an enclosed aluminium housing and oil-and moisture-resistant keyboard. The instrument may be used to operate skidded or skidless drive units, in either case the drive units may be hand-held or fixtured. Measuring results are displayed on the screen both numerically and graphically. Settings may be made and the measuring program written through the touch-screen.
Because the system is based on Wavesystem components, the modular design can be used to create a system configuration from a simple measuring station with skidded probes to a measuring station with reference scanning systems and motorized measuring columns.
