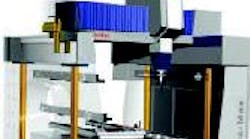
The new CenterMax Production Measuring Center from Zeiss takes CMM accuracy to the shop floor.
Carl Zeiss IMT Corp., Maple Grove, Minnesota, has introduced the new shop-floor CenterMax Production Measuring Center. To meet the increasing need for adaptable measuring and inspection in the production environment, the new bridge-type coordinate measuring machine works right next to machining centers — offering increased ruggedness and accuracy, enhanced flexibility, and optimized measuring volume.
Its temperature-resistant frame consists of mineral casts and carriers made of Invar, a special steel with an extremely high portion of nickel. This material combination provides ideal thermal and dynamic damping properties, making the system resistant to extreme shop-floor conditions. So there is no need for a special inspection lab or a protective enclo-sure. The machine's accuracy is guaranteed over a temperature range from 59-95°F. An active anti-vibration system, included in the standard version, protects CenterMax against floor vibrations.
CenterMax has a measuring volume of 35 4727 in. It can include a 16-position probe-changer rack without reducing the measuring range. With an accuracy of u1 = 1.3 + L/350, the Center-Max meets the most demanding measuring tasks.
A pallet-carrier frame, a granite plate, or a rotary table all integrate into the CenterMax's bed, thus allowing for flexibility when part loading from all three sides. Since the clamping range is located below the measuring volume, loading systems, rotary tables, and clamping fixtures are useable without any loss in measuring range. The entire measuring range is available for the workpiece.
The CMM comes with the VAST universal scanning-probe head for single and multi-point measurements as well as other measuring tasks. With VAST, the CMM user can check a wider range of feature tolerances as compared to traditional probing technology. VAST also offers the added reliability of extremely high data density.


