Once a hole is drilled, bored and honed, the challenge becomes inspecting it to ensure that its dimensions are to tolerance and that its surface is finished to the job’s specifications.
Narrow and deeply bored holes make it difficult to confirm that the hold and its surface are to spec is challenge.
Three companies have developed new products to make the job of inspecting bored holes and their surfaces easier.
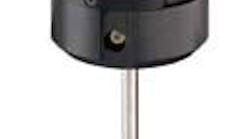
Gradient Lens Corp. (www.gradientlens.com) has commercialized a line of slim bore scopes in 10 in., 14 in. and 17 in. lengths.
Gradient said its Hawkeye Pro SuperSlim bore scopes are designed to inspect in deep, very narrow bores in machined parts, fuel and hydraulic systems, castings, tubing, firearms and other products.
The bore scopes are designed to give sharp, clear views in very narrow bores. They have an outside diameter of 0.110 inches (2.8 mm) to allow inspection of bores as small as 1/8 in.
Gradient’s bore scopes use the company’s patented endoGRINs lens system that allows them to relay high quality images a long distance. The company said the users can clearly see surface finishes and defects such as burrs in deep bores and cross-holes.
The bore scopes feature a 0-degree direction-of-view and a 40-degree field-of-view, and provide a rotating, 90-degree direction-of-view with a mirror tube attachment.
Sunnen (www.sunnen.com) has developed a line of bore gages that are designed to perform precise, in-line ID measurement in honing, grinding, boring, reaming and drilling operations or incoming part inspections.
Sunnen said its PG-Series Bore Gages are designed for fast, simple, economical process control in a lean manufacturing environment. The gages have lab-precision accuracy, to ±0.000025 in. (0.0006 mm) with a shop-hardened, mechanical design. The company said the PG-Series gages put reliable ID gaging on the manufacturing floor without a need for electrical or air connections so that they are immune to fluctuations in line voltage or air pressure.
The gages are designed to be mounted at machining stations, and use unique fixtures to enable simple, two-minute setup.
They are made with an analog, speedometer-type scale that provides readouts to 0.000050 in. (.001 mm). The gages are available in models for gaging IDs from 0.090 in. to 4.310 in. Metric models cover IDs from 2.0 mm to 109.47 mm.
They can be either purchased outright or leased on a monthly basis directly from Sunnen. The lease program includes maintenance and system updates.
Sunnen said its PG-Series Bore Gages can be used to examine the entire bore for diameter, taper, barrel, bell mouth, out-of-round and lobing. A sliding faceplate with adjustable stops permits end-to-end examination of bores. Stops can be set to allow examination of a particular section of the bore, with accuracy right up to the edge of ports, lands and ends.
Hommel-Etamic (www.etamic.com) has an automated in-line part inspection for bores, such as those in connecting rods, brake master cylinders, injection system components, and hydraulic valves that cannot tolerate surface finish defects.
Hommel Etamic said its IPS-10 internal inspection system is the first device of its kind, and provides 360-degree optical inspection for bore surfaces. It consists of an optical sensor, computer, and a slide that positions the sensor.
It is designed to be installed within a production line to inspect bores with a diameter of 14 mm to 50 mm (0.551 in. to 1.97 in.) and depths to 450 mm (17.72 in.) Typical cycle times are only seconds per part to produce a complete optical inspection of a bore’s inside surface.
Hommel Etamic said the system is ideal for flexible production because adaptation to a new part type is easy. <<
Heard at the NTMA annual meeting
“We used to only accept a new hire who could score 70 percent or better on an aptitude survey in the areas of math, mechanical reasoning, and abstract reasoning. For at least the last five years, we are lucky to find someone who can score 35 percent in these areas. These things are just not being focused on in our schools. Declining math abilities are becoming a national epidemic.” —Chuck Guiste
Training Director at the Learning Institute for the Growth of High Technology, a division of Penn United Technology Inc., speaking on finding skilled labor at the recent annual meeting of the National Tooling & Machining Association.


