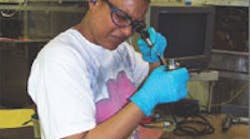
Galaxy's automotive customers quickly get products to market because the shop uses a Laser Design service bureau for faster 3D laser scanning, which, in turn, lets it quickly produce customer molds.
SWITCHING TO A 3D LASER-SCANNING SERVICE BUREAU FOR reverse engineering lets a blow-mold manufacturer help its automotive-aftermarket customers quickly get their products to market. Galaxy Tool's customers frequently provide interior components for which the Winfield, Kans., shop reverse engineers and builds molds. After trying several methods, including duplicator machines and CMMs, Galaxy now sends this work to a Laser Design service bureau that uses lasers to quickly turnaround 3D-coordinate-point-cloud files that accurately represent the original part.
"It used to take at least two weeks working on a CMM and in a CAD program to produce a model that we were not totally happy with," says Emmett Clevenger, plant manager for Galaxy. "With Laser Design, we ship the part, and it e-mails an accurate file within a week. And the cost is much less than if we did the job in-house," he says.
According to Clevenger, the biggest problem is that a CMM measures points one-by-one, which is often fine for inspection but it still takes a lot of time to reverse engineer a complicated component, especially one with many 3D contours. "While a CMM determines a probe's position accurately, placing the probe in exactly the right position for a measurement can be difficult," he points out. "In some instances," he continues, "parts have small cavities that a probe won't fit into, and many automotive-trim components, for instance, are flexible and easily bent out of shape."
For Galaxy, the process meant five days of collecting enough points to define a part geometry and another five or so to convert those points into a surface model for creating a CNC program.
Laser Design sells the 3D laserscanning systems that its service bureaus use for reverse engineering and inspection. The systems range in size from low-cost portables to high-accuracy CMM-based scanners. Laser scanners collect thousands of points every second at an accuracy said to be impossible with contact-touch-probe methods. They also handle more-complicated parts, and because there is no part contact, measurement accuracy is independent of the operator's skill.
"The Laser Design models are so good," says Clevenger, "that we turn them directly over to our CNC programmers without touch-up. Several times the bureau has even sent its people with a portable scanner to a local automobile dealer to measure a new model the minute it hit the streets. This kind of service increases our quality and gets jobs through our door faster."
Laser Design
MINNEAPOLIS
laserdesign.com


