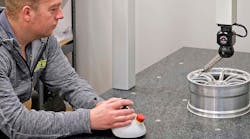
Methods Machine Tools Inc. is offering what it calls “a breakthrough in noncontact comparative measuring technology”: CAD auto-align and auto pass/fail software. These patent-pending tools for the VisionGauge Digital Optical Comparator System developed by VISIONx Inc. allow machine programmers and operators to compare a part to its CAD data in real-time.
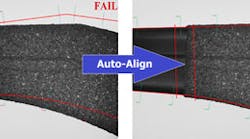
VISIONx is a specialty developer of automated image, visual inspection, and high-accuracy measuring programs. Its Auto-Align tool automatically aligns the CAD data to the part, typically taking less than two seconds to produce its result, in what Methods described as a ”straightforward” process. The tool produces repeatable and accurate results that are completely operator-independent, and it supports both X-Y and X-Y-rotation alignment of the CAD drawing to the part.
VISIONx Inc. has installed numerous systems for manufacturers in a range of industries over the past two years, including medical device and orthopedic manufacturing, aerospace, cutting tool manufacturing, automotive, and general machining. Methods Machine Tools, which is distributing the tool throughout North America, states that the VisionGauge technique is “at least ten times more accurate than traditional optical comparators and allow users to achieve a much higher throughput.”
The VisionGauge Auto-Align tool allows users to drastically reduce inspection times and obtain increased accuracy. It can line up the CAD drawing to the part along one or more data points, or it can do a "best fit" alignment.
The geometry-based Auto Pass/Fail tool automatically determines whether or not a part is within tolerance, accurately and in real-time. It can be assigned to analyze single points or to consider complete geometric entities, and it can take both approaches simultaneously on the same part. In the point-based mode, a part's deviation from nominal is evaluated at precise user-specified cross-sections to verify that the part is within tolerance at all of these locations.
The Auto Pass/Fail tool verifies whether or not a part is within tolerance over complete geometric entities. It supports bi-directional tolerances and imposes no restrictions on the tolerance values, meaning that standard "plus/minus" tolerances may be used, or the "minus/minus" or "plus/plus" tolerances.
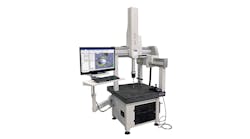
The VisionGauge tools are fully digital, “drop-in” replacements for traditional optical comparators that work directly with a part's CAD data, requiring no overlays, Mylars, or templates. They are available in industry-standard 5X, 10X, 20X, 50X and 100X magnifications.
It is a Windows-based system delivered network-ready for shop-floor configuration, and can be programmed to collect complete electronic documentation and device history automatically.
