Measure and cut on one machine? Today's advanced technology will be tomorrow's run-of-the-mill practice.
On this framearc section making up the fuselage barrel of a Boeing 747 aircraft, a probing system measures the formed sheetmetal parts to determine the best-fit location for drilling assembly holes.
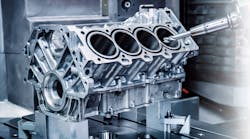
A touch-trigger sensor checks an engine block, automatically "buying off" the work during the machining cycle on transfer-line processing.
A touch-trigger probe sets up a casting for machining.
Graphite electrodes — used in an EDM process to burn out cavities in molds — receive final-inspection probing on the machine tool.
On this twin-pallet VMC, the laser sensor does fast tool setting. The sensor's transmitter and receiver mount outside the working volume, allowing tool checks during machining.
While many shops are using in-process sensors to control their machining quality, some manufacturers are still cautious, fearing these systems will drive up their cycle times. But that's far from the truth, say the experts at Renishaw Inc., Hoffman Estates, Ill. According to the company, measuring and cutting on the same machine tool offers so many competitive advantages that the practice will become standard in the factories of the future.
Probing systems let manufacturers automatically monitor, correct, and document in-process operations without operator intervention. While the machine is running, probing automatically corrects for manufacturing variables such as operator skill, machine-process capability, material type, and shop environment through closed-loop process control, which feeds data gaged relative to the machine's coordinate system back to its controller for compensation in the machining program.
Dan Skulan, Renishaw's regional sales manager, explains probing systems fall under two broad categories: partsetup/inspection and toolsetting. Setup/inspection probes are touch-trigger sensors that mount in a machine tool spindle or turret and are used just like any other tool in the machine. Toolsetting probes, on the other hand, are either noncontact laser or touch-trigger sensors that attach to a machine tool table or brackets outside of a machine's operating volume.
Closed-loop control
For closed- loop control, setup/inspection probes monitor the size and position of critical points at certain stages — such as before finish machining — by generating trigger signals when the sensor ball touches the part surface gage-reference points. These are typically defined in CAD/CAM applications.
After the machine tool receives the signal, the machine has a " snapshot" of the datum point's location and orientation in terms of axis position versus programmed position. The probing software then either automatically updates the tool work-offset register in the controller to maintain in-tolerance part production or sounds an alarm, notifying operators of excessive part-tolerance deviation.
"Process control such as this started with the aerospace industry," Skulan remarks. "For example, a company might have had $40,000 and a lot of manufacturing time invested in a casting. If at any point, the process went out of tolerance, they couldn't re-machine, so they would have to throw the whole thing out. Needless to say, that gets expensive."
According to Skulan, with in-process probing, shops first cut a part, for example, 0.003 or 0.004 in. over. The probe then captures the part measurements and automatically resets offsets, ensuring the finishing cut removes just enough material to stay in tolerance.
Dave Bozich, machine tool products business-manager at Renishaw, reports that besides providing closed-loop control, machine tool probes can also boost machining efficiency and accuracy at nearly every other stage of the process:
Job identification. For automated part-processing, probes determine if the correct part has been loaded and call up the correct NC program.
Setup. Used to locate the part automatically and establish a work coordinate system, probes reduce setup time to seconds and eliminate nonproductive machining passes, boosting machine productivity. Setup probes also eliminate complex and expensive locating fixtures — a major benefit. Because the probe "finds" the part, fixtures merely need to hold it.
Toolsetting. Toolsetting probes automatically set tool length and diameter and identify broken tools while a machine is running. A toolsetting probe is an economical solution for on-machine verification of tool geometry and condition.
Final inspection buy-off. Using onmachine probes lets shops "buy off" a part while still fixtured, greatly shortening in-process time. It eliminates the additional steps, time, and costs to remove clamps, transport the part to a CMM, refixture it, account for thermal effects, and reestablish datum points before measuring.
First part inspection. With Renishaw's master artifact-comparison technique, probes make first-part inspection seamless and automatic in verifying that required dimensions have been achieved. Probing eliminates the delays and lost spindle time for manual inspection, especially when the operator needs to tear down the setup to inspect the part, then reinstall it for any compensating cuts.
An exact touch
Touch-trigger probes are constructed to withstand tough machining environments. The probe is made up of a stylus, probe body that houses the triggersensing electronics, probe head, signal transmission technology, and machine/controller interface. The probe stylus consists of a shaft made from stainless steel, tungsten carbide, ceramic, or carbon fiber, and a touch ball (shapes other than ball may be used) made of hard metal or a special material such as ruby, zirconia, or silicon nitride attached to the shaft.
Touch-trigger probes designed for small VMCs and high-speed machines have kinematic resistive sensors that combine mechanical and electrical-sensing capabilities in one mechanism, while touch probes for high accuracy and complex parts instead feature straingage technology. Rather than having contacts — such as in a switch a silicon strain-gage measures the forces transmitted through the stylus. This is more accurate than contacts because trigger force is generated equally in all directions.
Sending the signal
After the touch probe triggers a signal, the signal is transmitted to the receiver, usually hardwired to the machine controller. In applications where the receiver is far away from the probe and cables are not practical, signals must travel from the probe via a wireless system.
One system is inductive transmission, which digitizes the sensor-measured value. Inductive systems need no battery, yet provide positive signal transmission across a tiny air gap in environments with oil, coolant, metal chips, and other contaminants. Inductive systems require precise positioning of their transmission modules, making them best-suited for OEM installation.
Another wireless system is the optical, or infrared, which transmits the trigger signal through an infrared light beam. A battery-powered probe sends signals 360° — over about a 10-ft (short to medium) range — that are immune to disturbances, including reflected signals. Infrared systems are simple and easy to install on new machines and to retrofit on older machines without probing.
For large machine tools and complex-geometry parts requiring probing of internal features, radio-transmission systems transmit up to 49 ft. and handle applications where there is no direct line-of-sight between the sender and receiver. Renishaw's special radio technology uses automatic frequency hopping, in which signals constantly move around different channels to find an open frequency. This avoids blocked transmissions and dead spots to ensure data integrity.
Lighting the way
Noncontact laser sensors pass a laser beam between a transmitter and receiver. When the cutting tool intersects this beam, it triggers the signal. Laser toolsetters automatically check tool length, diameter, and tool profiles, eliminating manual setting with slip gages and trialpartmeasurement with micrometers. Also, there is no runout or insert-height-variation error because tools are set while rotating.
According to Renishaw, routines for setting the length of a tool with a noncontact system merely involve the operator moving the tool anywhere across the beam and executing a simple G code. This automatically updates the active tool offset.
Laser sensors also perform fast "on the fly" checks for broken tools during cycle. (Although contact-type toolsetters can also check for broken tools, the tool must be brought to the toolsetter to make contact.) The tripped signal either flags the broken tool, so an operator can replace it, or flips in a redundant tool so machining instantly continues. Thus, a single broken tool no longer causes a shop to scrap a batch of parts.
Artifact Comparison
In this Renishaw application, an artifact is mounted in the same rotating fixture as workpieces. This lets the probing system make dimensional checks for possible compensation before machining critical features.
An artifact is a master part made from the same material, with the same dimensions, by the same manufacturing operations, as parts being machined. The artifact may not have all the features of the finished article, but it does have the critical gage points.
Renishaw first measures the artifact in a lab on a CMM calibrated to traceable international standards such as the National Institute of Standards and Technology (NIST) in the U.S. or the National Physics Laboratory (NPL) in the U.K.
The company also checks its machine tool is process-capable by qualifying it to an industry standard such as ISO 230 or ASME B5.54, which both call for ballbar and laser-calibration checks. Skulan says it's important to note that these standards don't specify the accuracy a machine must meet — they merely determine the accuracy it can meet (its process capability).
The company then locates the artifact in the machining envelope, typically as part of the setup or fixture. At various points in the machining cycle, a spindlemounted probe measures the size of a feature on the artifact for comparison with the programmed part dimensions. Any difference can be then be compensated in machining that feature on the workpiece.
Artifact comparison is especially effective for catching angular and transient thermal errors — two types of error that laser compensation cannot address. According to the company, manufacturers can use this technique on almost any machining center, holding tolerances near the machine's repeatability specification as well as compensating for thermal effects. Artifact comparison also handles first part and finalpart qualification.


