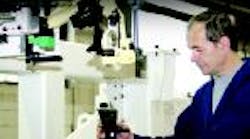
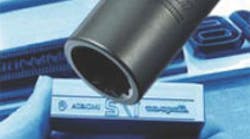
An Oprema industrial engineer uses a portable Leica T-Probe and Laser Tracker that eliminates moving parts to a CMM.
To maintain competitiveness and secure future work in the automotive-parts subcontracting business, Oprema Ravne (www.sz-oprema-ravne.si), a medium-sized company in Slovenia, had to eliminate an accuracy assurance and verification bottleneck in its production workflow. Outsourcing major CMM jobs was not only cost-prohibitive, it robbed the company of valuable time during which production came to a standstill while parts were transported to and from an off-site CMM facility. In addition, customers required that Oprema have in-house ISO 9001-certified CMM processes as a condition of continuing doing business with Oprema.
The problem came to a head when the company was vying for a job from a major European car manufacturer. The car maker was introducing a next-generation model, and a version of that car was going to be built in China about a year down the line. It needed a shop to build two side frames and one bottom frame for the new model and expected delivery of completed jigs within eight weeks after issuing blueprints. Unfortunately for Oprema, winning the job meant fulfilling a requirement of having an ISO-compliant, in-house CMM that was certifiable and accurate to 0.1 millimeters over 5 meters or more, with the emphasis on "more."
After realizing an articulated-arm system offered neither the measurement volume nor the accuracy needed, Darko Jevsnikar, Oprema managing director, and a couple of his industrial engineers attended a product demonstration of Leica Geosystems' (www.leicageosystems.com) Universal CMM with a Leica T-Probe mated to a Leica Laser Tracker. "To say that we were impressed with the system almost misses the point," says Jevsnikar. "We wanted to start making money with it immediately." The drawback was that Oprema's system would not be ready in time for the company to win the automotive job, so Leica loaned Oprema a complete system while the shop's own system was being built. The shop got the job and built the three jigs in under eight weeks by meeting the accuracy requirements and having the ISO-compliant loaner system.
"We are at least 20 to 30 percent faster because we now bring the CMM to the part and not the other way around," says Jevsnikar of the shop's own Leica system. "We no longer lose time positioning large and heavy parts into a CMM machine then having to move them back to a mill. Ironically, the same company we used to outsource large CMM jobs to now comes to us when their own machine hits its limits," he says.
For many jobs, Oprema also transports its Leica Geosystems T-Probe to customer facilities to complete installations, and despite being moved around all the time, the system requires no calibration, says Dominik Hudopisk, an Oprema industrial engineer. "I doubt we will need to do it (calibrate) more than just once a year, and with the system's Metrolog XG software, I can immediately analyze data right there in the field," says Hudopisk.
Shop Sends Manual Labor Down The Tubes
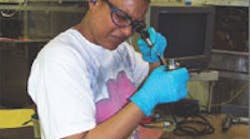
Ultrasonic parts cleaning helps Eaton Aerospace meet stringent quality standards.
Customers of Eaton Aerospace (www.aerospace.eaton.com) in Jackson, Mich., are quite fussy about how the tubing produced by the shop looks. The tubing goes into aircraft such as the Airbus 380, the F-22 Raptor and F-35 Joint Strike Fighter to convey air, oil, water and Freon. Besides being properly machined and meeting internal quality standards, tubing must be well cleaned. Eaton relies on ultrasonic-cleaning systems.
Eaton's ultrasonic systems eliminate five to ten minutes of hand labor per tube produced. Multiplied by the facility's output, that translates into 20 hours of saved labor weekly. "Our plant can't afford to be slowed down or stopped, and prior to the ultrasonic systems, we cleaned tubes manually," says Bud Greener, manufacturing engineer at Eaton.
"Now, we put them (tubes) into the cleaning systems, adjust the settings and walk away to do something else while the parts are being cleaned."
The shop runs Super Pro and Pro Plus ultrasonic-cleaning systems from Omegasonics (www. omegasonics.com) and two European-made ultrasonic machines that Omegasonics retrofitted with its own components. The Super Pro and Pro Plus units ride on wheels for maximum flexibility in placement and shop layout at Eaton. For many years, Greener and his team cleaned tubing with mineral spirits and Stoddard solvent. Runoff went into a filtered tank that a contractor would rotate because Stoddard solvent is a petroleum mixture and requires special storage, usage and disposal considerations. The Omegasonics systems are environmentally friendly. Their baskets easily accommodate Eaton's odd-shaped and small items and they thoroughly clean tubing inside and out in a hands-off process.
Eaton bends raw stainless steel tubing ranging in size from 0.750 to 3.00 in. in diameter into complex shapes. The shop cuts tube sections to length and bends them with a mandrel, a lubricated tool inserted into the tubing that prevents kinking. Post-bending cleaning is mandatory to remove processing oils and tube-bending lubricants.
Because Eaton's output includes oversized bent tubes, it also uses two, previously purchased, European stationary ultrasonic machines with large-capacity tanks. When the internal components of these units had to be replaced, Eaton brought the systems back to life. It installed six Omegasonics transducer and generator sets per tank and built new control panels for the units.
Inserts Improve Rough Turning
Heliturn LD inserts speed roughturning operations at Euclid Universal.
Euclid Universal Corp. (www.eucliduniversal.com), an Ohio manufacturer of gear motors and power transmissions, realized that its core gear and shaft production suffered because of long, costly rough-turning cycles. As efficiency dropped, the shop determined that a tooling upgrade was necessary, so it incorporated a turning tool that features an 80-degree rhombic insert and lay-down R-clamping instead of traditional clamping. R-clamping provides edge-position repeatability and an extremely sturdy hold on the insert.
The 20-hp CNC lathes at Euclid Universal run CNMX 542-HTW Heliturn LD inserts from Iscar (www.iscarmetals.com) and cut parts out of 4140 and 8620 steel. The inserts boost cutting speeds from 500 to 650 sfm and double feedrates from 0.010 ipr to 0.020 ipr, thus creating a much more efficient turning process at the shop.
While machining under these conditions, Euclid Universal extends tool lives from 100 pieces per cutting edge to 150 per edge. This 50-percent improvement helps to reduce overall cycle times by limiting the number of times the machine must be stopped to replace worn tools. Operations that previously had 2-minute cycle times now run in 1.33 minutes, operations with previous 3-minute cycle times are down to 1.75 minutes, and previous 1.75-minute operations take 1 minute. Heliturn LD inserts also provide more-reliable cuts — eliminating the broken-edge tool failure that had been a problem with Euclid Universal's previous tooling. The inserts also produce smoother cuts compared with previous tooling and reduce or eliminate the need for subsequent finishing operations.
LD inserts feature positive, radial, helical cutting edges, positive rake angles that reduce cutting forces and increase metal-removal rates. Surface qualities from the inserts exceed those of traditional roughing tools, says Iscar, and for higher surface finishes, an 88-degree, corner-angle Heliturn LD is available.
Software Helps Solve The Impossible
Bernard Mould designed this hot-water crossover valve in less than two weeks with KeyCreator software.
Customers often approach Bernard Mould (www.bernardmould.com) with designs that look good, but are flawed. The flaws can range from errors in manufacturability, to issues caused by the translation errors between design software packages, to difficulties with surface modeling. However, the Windsor, Ontario, company never hesitates to take on these projects that are impossible to see through to manufacture because it uses KeyCreator software from Kubotek USA (www.kubotekusa.com).
For one such impossible project, a tier-one manufacturer that specializes in engine-temperature-control systems, was developing new hot-water crossover valves for a Japanese OEM. While Bernard worked previously with this customer on parts for domestic automakers, this was its first collaboration for an off-shore automaker.
The existing part was sand-cast aluminum that was expensive to produce. After reverse engineering the part, the tier-one customer wanted Bernard to design a manufacturingfriendly part. Using KeyCreator, Bernard designed the new hot-water crossover valve in less than two weeks. The result was a class-A prototype that had seven mechanisms. It also had production-quality parts and demonstrated it could be made within production-capable cycle times.
KeyCreator enabled rapid design and more-efficient valve machining and had flawless translators, letting Bernard's customer export the design back into their other CAD/CAM tools. Bernard can reverse engineer any design and identify miniscule errors and design flaws with KeyCreator. This speeds up the tooling process and minimizes the costs associated with poorly manufactured products.
"Ultimately, this business is all about competition," says Ed Bernard, president of Bernard Mould. "Not only has KeyCreator enabled us to develop a reputation for innovative products developed rapidly, it has allowed our customers to quickly respond to increasing competition."
Since KeyCreator is geometry based, it offers designers an intuitive approach to drawing and modeling and allows for easy exchange of data between other CAD/CAM packages. Designers can blend solid, surface and wireframe-modeling techniques. That allows businesses such as Bernard to offer their customers a wide range of design and manufacturing approaches to meet their goals.
The software also has built-in, time-saving capabilities for converting properly defined surface and wireframe models into solids and extracting surface and wireframe models from solids. Such flexibility opens up more possibilities for Bernard and its customers.
