If the movies have taught us anything it is that humans are still smarter than machines. Sure, we tend to be smaller, weaker, and less predictable, but we still have the edge in terms of intelligence — especially when it comes to getting the best performance and value from machines processing giant chunks of metal.
One man proving this is machinist Keith Woodhouse of Aero Components, a CNC and manual machining shop in Oklahoma that produces close-tolerance, fine-surface finish parts. Since 1981, Aero Components has been producing difficult-to-machine parts in stainless steels, titanium, Inconel®, Hastelloy® and other exotic materials.
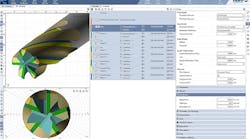
Aero Components is the place where Woodhouse has made man-versus-machine a real-life contest. He has learned to maximize the company’s existing inventory — its machine-tool lineup and ESPRIT computer-aided-manufacturing (CAM) software by DP Technology — to save countless hours, and even days, of production time.
So, just how much smarter than the machine has Woodhouse proved to be?
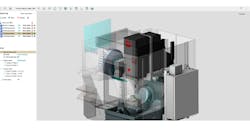
Woodhouse’s challenge began in 2008 with Aero’s acquisition of a Mazak Vortex 5-axis CNC machine tool, a tool that’s easily capable of producing complex aerospace parts. While the new machine tool made for finishing large parts fast and efficient, the task of inspecting the parts was trickier.
Prior to the introduction of the Mazak Vortex machine, it was standard practice at the company to use a coordinate measuring machine (CMM) to check tolerances of machined parts against corresponding computer-aided-design (CAD) models. “The computer knows what the shape and size are supposed to be and the CMM verifies that the part is within tolerance,” Woodhouse said.
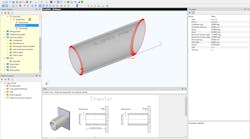
CMMs use touch probes to inspect the accuracy of parts by taking measurements in X, Y, and Z-axes and comparing them to a corresponding CAD model. At Aero, in addition to a final inspection performed once parts were fully machined, they were checked by CMM at several points throughout the machining process.
Though Woodhouse continued inspecting parts on Aero’s existing CMM following the addition of the Mazak Vortex, the task had become particularly time-consuming and tedious due to the large size of the parts produced on the Vortex — parts such as those for the new F-35 joint-strike fighter.
For instance, one part that would ultimately be whittled down to 30 lb at the end of the machining process began as a whopping 650-lb hunk of metal. The size of the workpiece and the hardness of the material made machining it a particularly time-consuming effort, and the difficulty of properly testing and reposition the parts added to the challenge.
“A lot of the time, when you take the part off of the machine and put it on the CMM to inspect it, it’s hard to get it back to the right place on the machine,” Woodhouse said. “If I have to take the part off the machine and take it to the CMM, we are talking (about) hours.”
This back-and-forth between the Vortex and a CMM capable of inspecting just one area of a large part at a time meant lost production time for both tools. Often, it would take hours and sometimes days to machine and inspect a part, and 5-axis part features could be inspected only on a CMM to the CAD model.
Woodhouse had to come up with a different plan, and skipping verification was not an option.
“You’ve got to make sure your program and tooling are right before you start cutting on the material,” Woodhouse said. “The material is so big and so expensive that you can’t just scrap a part.”
In the business of machining high-value precision components, mistakes cost money — but lost production time costs money, too. For Aero, plan B had to include a way to verify parts every step of the way as they were being machined.
Woodhouse did his homework. Because buying a new CMM for $75,000 to $100,000 was simply out of the question, he considered a portable CMM arm complete with software, for about $45,000. However, because it offered no improvements in accuracy over the existing procedure, the arm was a less-than-optimal and still costly option.
Then, Woodhouse researched part-inspection software and the possibility of a touch-probe in the actual machine tool, but “it is $12,000 to $20, 000 to do 3D-vectored probing,” he learned. It was not the cost-effective approach he was looking to find.
With steps one and two eliminated, the third step — thinking about how the company could capitalize on what it already had — proved to be just right: What Aero already had was a Mazak Vortex machine tool and ESPRIT CAM. “I realized that ESPRIT had a CMM tool feature,” Woodhouse said. “I remembered seeing it, but I had never checked it out.”
Upon closer inspection, Woodhouse determined that the CMM tool was a feature Aero could use to maximize the machine tool, get more out of the software, and think “smarter” than any machine by figuring out how to make existing inventory work better than it ever had.
First, Aero purchased Renishaw’s Inspection Plus macros for $1,076 (just a few dollars less than the two previous choices) to generate programs for part inspections.
Then, Woodhouse took the X, Y, Z, I, J, and K data in the file created by ESPRIT and fed it into an application designed by the team at Aero. “It takes the X, Y, and Z points and the I, J, and K vector, and creates a program using the probing macros that I can put into the machine to inspect parts like a CMM. Basically, we have a great, big CMM now,” he explained.
What’s more, the Vortex isn’t the only “great, big” CMM that the company now has.
“Because the probing macros are numbered the same for different controls, I can use the same program on any of our Fanuc or Mazak/Mitsubishi mills or Integrex machines with only minor changes at the beginning and end of the code,” Woodhouse said.
Now, within 30 minutes, Woodhouse can create a program that allows him to inspect parts on the machine and generate fairly complex reports on part integrity in relation to design intent. “It’s a huge time saver and it keeps the machine up and running,” he said.
Though the company continues to use its CMM machine to verify finished parts, the ability to operate from the machine tool has saved hours upon hours of production time.
“I always use ESPRIT on really complex parts,” Woodhouse said. “There are parts that would be impossible to program without ESPRIT.”
Still, despite the powerful machine tools and the software that drives them, it took a man to pull the whole thing off. To outsmart a challenge, there are times when it takes the willingness to really look at what’s right in front of you in ways that you hadn’t imagined — and that’s one thing that a machine will never do.
Stacey Wiebe is a public relations coordinator with DP Technology, Camarillo, Calif. Contact Stacy at [email protected]


